Add your own web application as a service
Even though the service remains available with a permanent ingress, it may be deleted during platform maintenance. We strongly recommend saving the service configuration at the time of creation using the “Save” button to facilitate restart in case of an outage, and saving your code to a remote repository or in your “My Files” space. The service content will use resources from your temporary storage, not the permanent storage corresponding to the content in “My Files”.
Deploy a static website
You can easily deploy a static website on your space, accessible at an address such as: https://my-custom-name.lab.dive.edito.eu
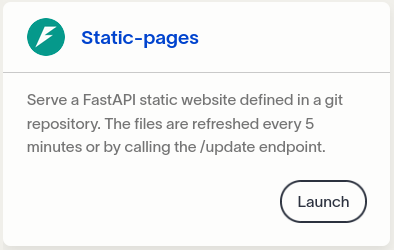
The Static-pages service allows you to host and automatically serve the files of a static website from a public or private Git repository. This service is ideal for hosting a documentation, a data visualization or any other static web content directly from your source code.
Push the required files (index.html, assets/, etc.) to a remote repository. Then, start a Static-pages service from your space on the Datalab. You will be prompted to fill in a configuration form.
If your repository is public, check Add git config inside your environment in the Git / Git user configuration section of the form to enable internal Git configuration, and simply provide the repository URL in Repository (Repository URL).
If your repository is private, you can add your authentication information in the corresponding fields:
- Name
- Token (personal access token)
By default, the service will pull files from the main branch of your repository. If you need to target a specific branch, specify its name in the Branch field.
Static website files
The service automatically reads the content of your index.html file. If your index.html file is located in a subdirectory of the repository, specify the path in: Website / Source - Path to the website files (in the repository). If the files are located at the root of the repository, you can leave this field empty.
Building your static website
In case your source files need to be built, you need to specify the path to the build script. This script shall install the tools needed to build the source files. Be aware that the script will run at every refresh of the Git files, hence it shall avoid re-installing dependencies every time.
This is an example of such a build script for a yarn-based website:
#!/usr/bin/bash

SCRIPT_DIR=$( dirname $(readlink -f "${BASH_SOURCE[0]}") )
pushd $SCRIPT_DIR > /dev/null

which node
returnValue=$?
if [ $returnValue -ne 0 ]; then
    curl -o- https://raw.githubusercontent.com/nvm-sh/nvm/v0.40.2/install.sh | bash
    \. "$HOME/.nvm/nvm.sh"
    nvm install 22
    echo "Node version: `node -v`"
    echo "Node current version: `nvm current`"
    echo "NPM version: `npm -v`"
    echo "Install Yarn..."
    npm install --global yarn
    echo "Yarn installed"
fi

yarn --cwd /app/repository install
yarn --cwd /app/repository build

popd > /dev/null
The
/app/repositoryis the home of your cloned repository in the running container. You can use the website source path variable specify at the service launch time if wanted, as followsapp/repository/$WEBSITE_SOURCE_PATH.
Customizing the URL
You can customize the service URL, for example: https://my-custom-name.lab.dive.edito.eu
This configuration is available under Ingress Details.
Updating your website
The service automatically checks the repository for updates every 5 minutes. To trigger an immediate refresh, call the public update endpoint /update:
https://my-custom-name.lab.dive.edito.eu/update
This will instantly fetch the latest changes from your Git repository.
Deploy from Shiny App Service
You can easily deploy your Shiny application using Shiny App service. This service retrieves your Python or R application directly from a public or private Git repository and deploys it automatically.
Using Shiny App with a Python project
To use the Shiny App service with a Python project, your application files must be stored in a remote Git repository. All required dependencies should be listed in a requirements.txt file.
- Git configuration
- Enable
GITsection - Provide your repository URL in the
repositoryfield. - If your repository is private, fill in the authentication fields (
Name,Email,Token) so the service can access your code.
- Shiny configuration
In the ShinyConfiguration section:
- Select the language: Python.
- Provide the path to your main Python script within the repository (e.g.
myproject/script.py, orscript.pyif the file is located at the repository root). - Optionally, provide the path to your dependency file (e.g.
myproject/requirements.txt).
- Optional settings
- Customize your application exposure in the
Ingress Detailssection. - Adjust the allocated resources (CPU, memory) in the
Resourcessection.
Using Shiny App with an R project
To use the Shiny App service with an R project, your application files must also be stored in a remote Git repository. The required R packages can be listed in a requirements.txt file.
- Git configuration
- Enable
GITsection - Provide your repository URL in the
repositoryfield. - If your repository is private, fill in the authentication fields (
Name,Email,Token) so the service can access your code.
- Shiny configuration
In the ShinyConfiguration section:
- Select the language: R.
- Provide the path to your main R script within the repository (e.g.
myproject/app.R, orapp.Rif the file is located at the repository root). - Optionally, provide the path to your dependency file (e.g.
myproject/requirements.txt). - The optionally
InitScriptPathfield allows you to specify the path to a Bash script. This script can be used to install system-level dependencies required by some R packages that are not available in the default Docker image used by the service.
- Optional settings
- Customize your application exposure in the
Ingress Detailssection. - Adjust the allocated resources (CPU, memory) in the
Resourcessection.
Deploy from a Docker image or a Dockerfile
Deploying from a Docker image or a Dockerfile is an early feature. Please, contact user support to be authorized to access the contribution tools.
Docker is a platform that allows you to build, package, and run applications inside lightweight and portable containers. These containers ensure that your application always runs the same way, regardless of the environment. For more information, you can refer to the official Docker documentation.
Helm is a package manager for Kubernetes that helps you define, install, and manage applications using reusable templates called charts. For more information, you can refer to the official Helm documentation.
Add Your Service to the EDITO Service Catalog
You can easily deploy a service in your workspace, accessible at an address like https://my-custom-name.lab.dive.edito.eu, from either a Docker image or a Dockerfile hosted in a remote repository.
To do so, use the add-your-service process available in the Contribution tab of the Datalab process catalog. This process retrieves an existing Docker image or a Dockerfile from a remote Git repository and creates a service that will then be accessible from the service-playground catalog.
Deploy from an Existing Docker Image
If you already built and pushed a Docker image to a registry, you’re in the right place.
Once you start the add-your-service process, fill in the Configuration form fields. First, enable the Container image is already built option by setting it to true, then specify your image URL in the Image tag field. Example: if your image is on Docker Hub, the URL will look like docker.io/myaccount/my-image-name:tag.
Finally, indicate the port used by your service under Network / Port.
Deploy from a Dockerfile
If your project is hosted in a remote Git repository and can be built with Docker using a Dockerfile, you can also deploy it this way.
Start the add-your-service process, and in the Configuration form, set Container image is already built to false. Then, specify the path to your Dockerfile from the root of your repository. Example: if your Dockerfile is in a folder named production, the path should be production/Dockerfile. If your Dockerfile is at root of the repository, the path should be Dockerfile.
Next, fill in the port used by your service under Network / Port.
You now need to provide Git repository access information in the Git section.
If your repository is public, check Add git config inside your environment in the Git / Git user configuration section of the form to enable internal Git configuration, and simply provide the repository URL in Repository (Repository URL).
If your repository is private, provide your authentication information in the corresponding fields:
- Name
- Token (personal access token)
By default, the service will pull files from the main branch of your repository. If you need to target another branch, specify its name in the Branch field.
Service Metadata
Whether you’re deploying from a Docker image or a Dockerfile, you must fill in some metadata about your service. In the Metadata form, complete the following fields:
- Service name
- Service version
- Service description
- Icon URL
- Homepage URL
You can also add keywords to improve search visibility within the service catalog.
Environment Variables
If your project requires environment variables, you can define them in the section Your service’s inputs that will be passed as environment variables.
Start Using Your Service
Once the add-your-service form is complete, start the process. When it completes successfully, it will automatically create your service.
Your service will be available within 5 minutes in the service-playground catalog. You can search by name to find it easily.
Customizing URL
Once you find your service, you can start it. You’ll have the option to customize its access URL under Ingress Details, for example: https://my-custom-name.lab.dive.edito.eu.
Configure environement variable
If your service needs environment variables, they will appear in the Inputs form.
You’re now ready to start and use your service!
Add a container-based service to the catalog of services
The following content is a copy of the Service playground README.
Helm charts service playground
⚠️ This is a development repository: A chart older than a week will be automatically deleted. To pass your service into production, please see Create a merge request
This collection of Helm Charts is tailored for playground! For all production services please use the Service Helm Charts repository.
This tutorial provides the guideline to follow to create your own helm chart that can host a Docker image web application. Do not hesitate to look at other charts to get inspired.
First thing first, you will need to have a Docker image hosted on a public repository. This image should run a container exposing a web service through a port.
In this tutorial, we will take TerriaMap datalab service as an example. The TerriaMap github project is available here if you want to know more about it.
And as you can see, this project satisfy the minimal requirement for hosting a web application on the datalab, which is having a public docker image available. You can find the corresponding Dockerfile here if you need to inspire you. Here, it is only running a node application on the port 3001.
Clone the repository
git clone https://gitlab.mercator-ocean.fr/pub/edito-infra/service-playground.gitCreate your own chart folder
You can start by copying the content terria-map-viewer folder inside your own folder.
cp terria-map-viewer terriamap-copy-exampleUpdate the chart configuration (minimal)
Edit the Chart.yaml file
Change the following fields and leave the others unchanged:
- name (the name of your service. This name must only consist of lower case alphanumeric characters, start with an alphabetic character, and end with an alphanumeric character. Hyphens (-) are allowed, but are known to be a little trickier to work with in Helm templates. The directory that contains a chart MUST have the same name as the chart)
- description (a brief description of your service)
- home (a page to learn more about your service, generate a “Learn more” button on the service tile)
- icon (an image that represent the underlying service)
- keywords (a list of useful keywords that can be used to retrieve your service from the datalab search bar)
- version (the version of the chart. Starts with 1.0.0 and update later if you need some changes)
- appVersion (the version of the service running inside your docker container. Maybe a version of your computation is present inside the repository where your service is versioned)
All of these attributes are mandatory, please find an icon even a generic one to illustrate your service.
name: terriamap-copy-example
description: Run a TerriaMap viewer server copy example.
home: https://github.com/TerriaJS/TerriaMap
icon: https://github.com/TerriaJS/TerriaMap/raw/main/terria-logo.png
keywords:
  - Viewer
version: 1.0.0
appVersion: "8.3.0"
Edit the templates/NOTES.txt file
The content will be rendered and displayed in a pop-up window while the service is being launched.
Your TerriaMap copy example application is being deployed.

It will be available on this [link](http{{ if $.Values.ingress.tls }}s{{ end }}://{{ .Values.ingress.hostname }}).
As you may see, you can use Helm values in this template file. Please take a look at the official Helm documentation to learn more about it.
Edit the values.yaml file
Change the service.image.version value by the link to your public docker image as well as the service port exposed.
...
service:
  image:
    version: "ghcr.io/terriajs/terriamap:0.0.8"
...
networking:
  ...
  service:
    port: 3001
...
Edit the values.schema.json file
Replace the Docker image links by the one you provided above as well as the service port. Note that you can provide multiple versions in the listEnum field.
{
    ...
    "properties": {
        "service": {
            ...
            "properties": {
                "image" : {
                    ...
                    "properties": {
                      "version": {
                        ...
                        "listEnum": [
                            "ghcr.io/terriajs/terriamap:0.0.8"
                        ],
                        ...
                        "default": "ghcr.io/terriajs/terriamap:0.0.8"
                      }
                    }
                }
            }
        }
    ...
Update the chart configuration (advanced)
Customizable ingress
It is possible to let the user choose his own ingress (URL) for accessing his service from the datalab. To add this behavior on your service, you’ll need to edit the values.schema.json file and remove the line that allows to hide the ingress configuration in the datalab. That’s all. A new tab will appear in the datalab to let the user change the URL of his service.
        "ingress": {
            "type": "object",
            "form": true,
            "title": "Ingress Details",
            "properties": {
                  ...
                },
                "hostname": {
                      ...
                    },
                    "x-onyxia": {
                        "hidden": true,  // Just remove this line
                        "overwriteDefaultWith": "{{project.id}}-{{k8s.randomSubdomain}}-0.{{k8s.domain}}"
                    }
                }
            }
        }
When you push your branch, your charts will automatically be published and accessible on EDITO datalab (they may be a 5-minute refresh delay).
Access S3 storage
It is possible to load credentials to access a personnal S3 storage directly into your service. The following configuration will automatically import the credentials from the project settings configuration.
First, to automatically load S3 credentials into your service configuration, add the following property in the values.schema.json file:
{
  "properties": {
    "s3": {
      "description": "Configuration of temporary identity",
      "type": "object",
      "x-onyxia": {
        "overwriteSchemaWith": "ide/s3.json"
      }
    },
    ...
  }
}
Then, add the following lines in the end of the values.yaml file:
...
s3:
  enabled: true
Then, you can create a secret-s3.yaml file with the following line inside:
{{ include "library-chart.secretS3" . }}This will create a Kubernetes Secret with the required AWS keys: - AWS_ACCESS_KEY_ID - AWS_SECRET_ACCESS_KEY - AWS_SESSION_TOKEN - AWS_S3_ENDPOINT - AWS_DEFAULT_REGION
Finally, use envFrom to define all of the secret’s data as container environment variables. The key from the secret becomes the environment variable name in the Pod:
envFrom:
{{- if .Values.s3.enabled }}
- secretRef:
    name: {{ include "library-chart.secretNameS3" . }}
{{- end }}
Deploy a stateful service
Right now, you have deployed a stateless service. Depending on your needs, you might want to deploy a stateful service. We encourage you to check a more complete (and complex) example that is our Jupyter Python Ocean Science helm chart. Instead of declaring a Deployment, you will need to write a StatefulSet. You can read more about it in the official Kubernetes StatefulSet documentation
Include Copernicus Marine Service credentials
It is possible to load Copernicus Marine Service credentials as environement variables in the service. The following configuration will automatically import the credentials configured in the user’s My Account.
First, to automatically load Copernicus Marine Service credentials into the service configuration, add the following property in the values.schema.json file:
{
  "properties": {
    ...
    "copernicusMarine": {
      "x-onyxia": {
        "overwriteSchemaWith": "copernicusMarine.json"
      }
    },
    ...
  }
}
Add the following properties in the values.yaml files:
copernicusMarine:
  enabled: false
  username: ""
  password: ""
Then create a secret-copernicusmarine.yaml file inside the templates folder with the following content:
{{- define "library-chart.secretNameCopernicusMarine" -}}
{{- if .Values.copernicusMarine.enabled }}
{{- $name:= (printf "%s-secretcopernicusmarine" (include "library-chart.fullname" .) )  }}
{{- default $name .Values.copernicusMarine.secretName }}
{{- else }}
{{- default "default" .Values.copernicusMarine.secretName }}
{{- end }}
{{- end }}

{{- if .Values.copernicusMarine.enabled -}}
apiVersion: v1
kind: Secret
metadata:
  name: {{ include "library-chart.secretNameCopernicusMarine" . }}
  labels:
    {{- include "library-chart.labels" . | nindent 4 }}
stringData:
  COPERNICUSMARINE_SERVICE_USERNAME: "{{ .Values.copernicusMarine.username }}"
  COPERNICUSMARINE_SERVICE_PASSWORD: "{{ .Values.copernicusMarine.password }}"
{{- end }}
Finally, load the secret values as environment variables in the container:
envFrom:
  {{- if .Values.copernicusMarine.enabled }}
  - secretRef:
      name: {{ include "library-chart.secretNameCopernicusMarine" . }}
  {{- end }}
Create a merge request
When you push your branch, your charts will automatically be published and accessible on EDITO datalab service playground (there may be a 5-minute refresh delay).
Once you think your chart is ready to be published, you can:
- Make sure the metadata are complete in the
Chart.yamlandREADME.mdfiles - Please provide somehow a point of contact for the users to reach you
- Pick a catalog category in which your contribution fit the best
- Create a merge request on the repository and ping @pub/edito-infra/codeowners in the description to catch our attention.
If everything is good, we will migrate your charts to the other category, and you will be granted accesses to maintain them (bug fixes, new versions, etc.).